Social Suite user manual
CONTENTS
7. General configurable options
Description
The Social Suite extension is easy way to attract new customers to your online store. Our extension is tightly integrated with the most popular social networks such as Facebook,Pinterest, Twitter and Google. With Social Suite your customers will be able to share their wish list, orders and reviews, like your products and categories and post comments on your products pages. That will create a social buzz around your store and increase number of social signals to search engines. Also Social Suite allows to use Facebook or Google accounts in order to login and make registration process easy and fast.Social Suite will help you :
- increase your visibility in social networks
- simplify registration process
- increase number of social signals for search engines
- decide on the correct social strategy of link building
Basic terms
Login with social network account - this feature allows to create customer's store account in easy and fast way by using their account in Facebook or Google.
Installation
Thank you for downloading our magento extension. Please follow these instructions to proceed with the installation of your theme:Turn store compilation off
Navigate to Admin -> Tools -> Compilation and deactivate compilation mode for your store.
Copy all files into your magento directory
Simply copy all files from "extension source x.x.x" directory into your magento store directory.
In case you have different then "default" default folder - rename folders app/design/frontend/default/default and skin/frontend/default/default.Turn your magento cache off
Navigate to Admin -> System -> Manage Cache and deactivate cache for your store.
Refresh your admin users access rights
Simply logout from your store admin and then login back.
Installation:
1. Navigate to System > Configuration > Templates-Master > Social Suite and enable extension for any store you need.
2. Configure Social Suite module according to your needs.
3. Set Up New Facebook Application at http://www.facebook.com/developers/createapp.php .
3.1. Set Up New Google Application at https://code.google.com/apis/console/#access.
4. If you are planning on using XFBML buttons, you will need to edit some template files
Change the opening html tag to read:
<html xmlns:fb="http://ogp.me/ns/fb#">
at next template files
- app/design/frontend/[package]/[theme]/template/page/1column.phtml
- app/design/frontend/[package]/[theme]/template/page/2columns-left.phtml
- app/design/frontend/[package]/[theme]/template/page/2columns-right.phtml
- app/design/frontend/[package]/[theme]/template/page/3columns.phtml
Code listed below should be added to phtml file in order to display social buttons. For example app/design/frontend/[package]/[theme]/template/catalog/product/view.phtml.
<?php echo $this->getLayout()->createBlock('core/template')->setTemplate('tm/socialsuite/facebook_like/like.phtml')->toHtml(); ?>
Code listed below should be added to phtml file in order to display social buttons. For example app/design/frontend/[package]/[theme]/template/catalog/product/list.phtml.
<?php echo Mage::helper('socialsuite')->getCategoryLikeButton($_product) ?>
That's all. Navigate to your products page and check how your store looks.
Google API creation
Before starting using Google integration features configuration, you have to create application. Please go https://console.developers.google.com/project and follow next recommendations: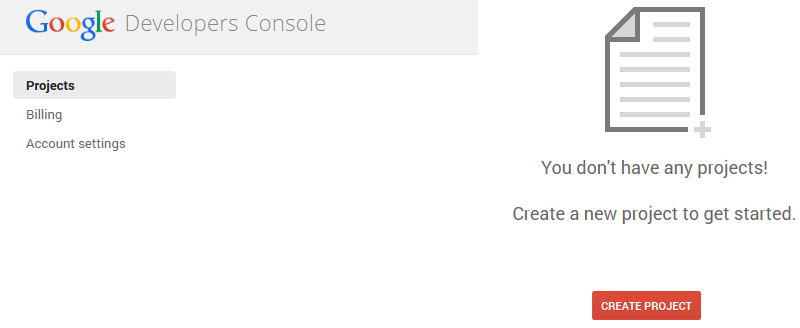
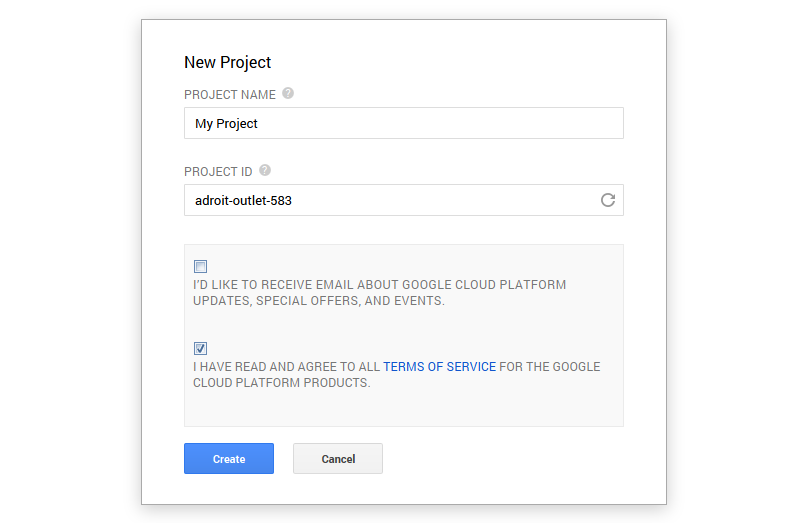
Please press Create Project button. Then fill the appropriate fields and click on Create.
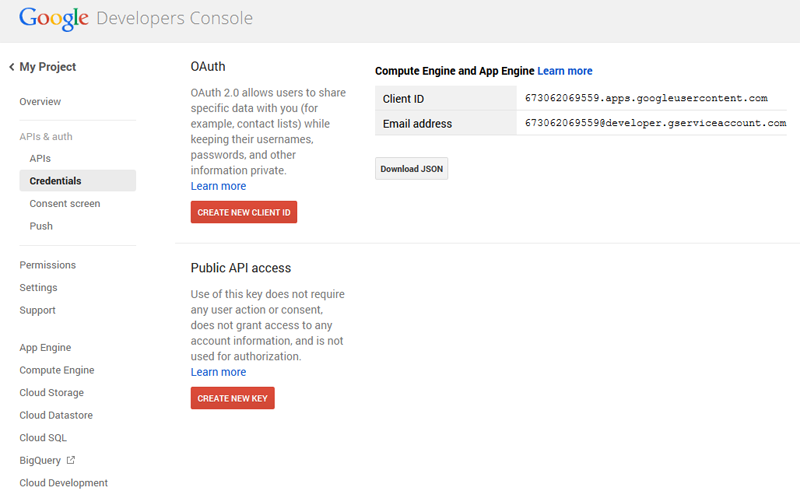
At the left top of the page click on APIs&auth and select Credentials condition. A new form will be opened.
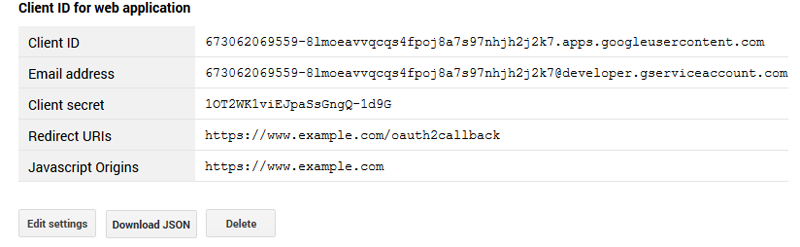
 Put the mark on Web Application. After that fill next fields. Please notice, that in the Authorised Redirect URL you should enter the following GOOGLE app REDIRECT URI parameter
http://YOURDOMAIN/customer/account/login/
Put the mark on Web Application. After that fill next fields. Please notice, that in the Authorised Redirect URL you should enter the following GOOGLE app REDIRECT URI parameter
http://YOURDOMAIN/customer/account/login/

Now you see your Client ID and Client Secret key. Please use it in the configuration process.
Facebook API creation
Before starting using Facebook integration features configuration, you have to create application. Please go https://developers.facebook.com . At first click on APPs at the top of the page and select the Create a new App condition from the drop down.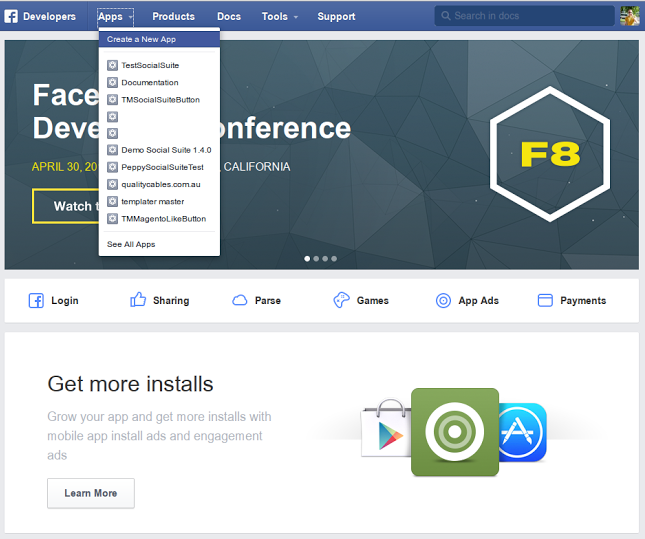
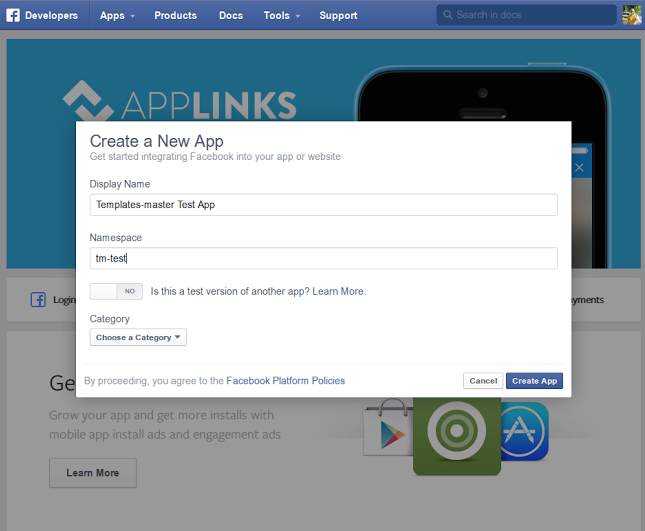
Now you see a new form that must be filled. Press Create App button.
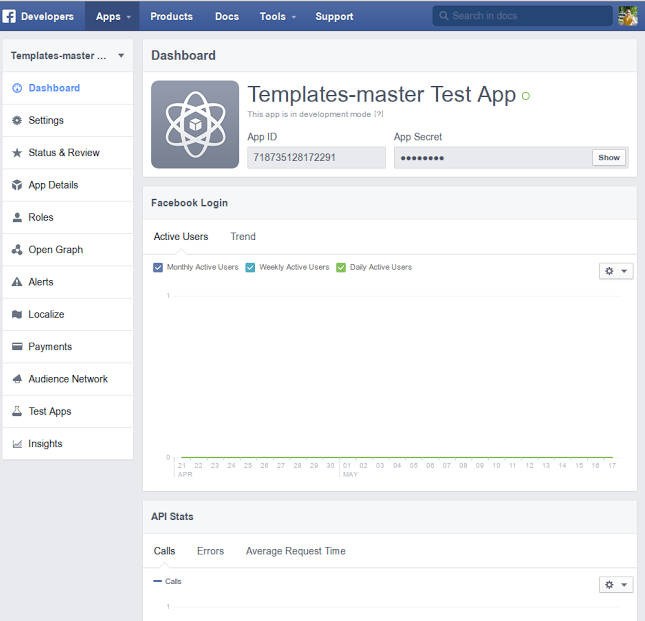
At the left navigation tree please choose Dashboard. Now you see your App ID and App secret key, that should be set in the extension configuration.
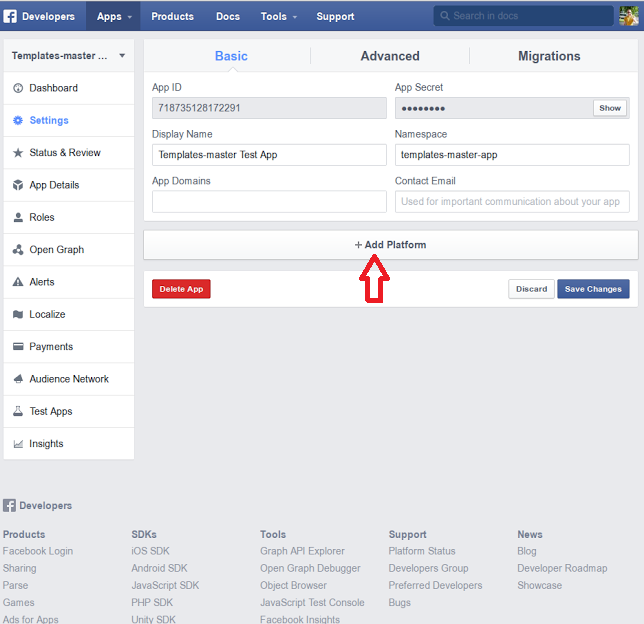
Please choose Settings condition and before you continue to fill the appropriate fields, you should Add Platform.
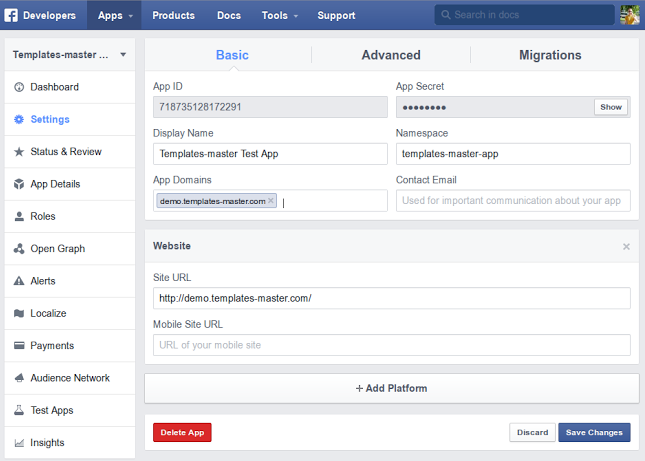
Press Save Changes button. Now you can fill the App Domain field. Please set URL of website you create the application to. Please don't specify http:// value. Press Save Changes.
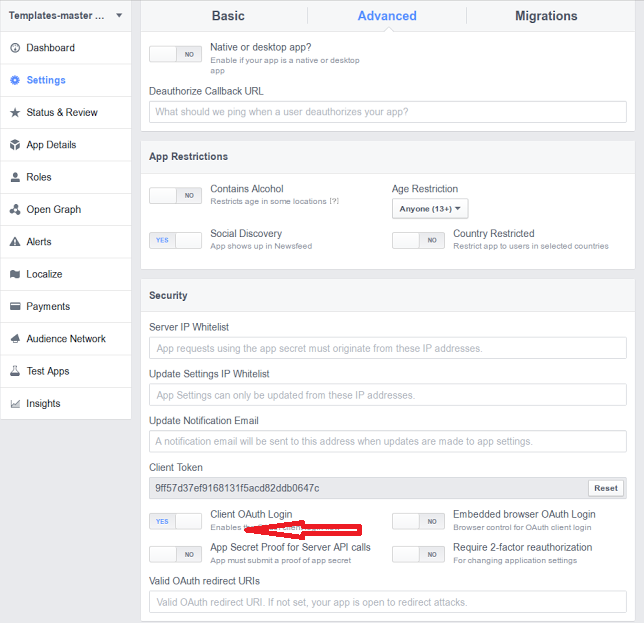
Now go to Advanced tab at the top of the page. And check if Client OAuth Login condition is set to Yes. That's all.
Twitter API creation
Before starting using Twitter integration features configuration, you have to create application. Please go https://apps.twitter.com/app/new. Click on Create an application. Now you see a new form that must be filled. Please specify correct values for the following mandatory fields, using our example.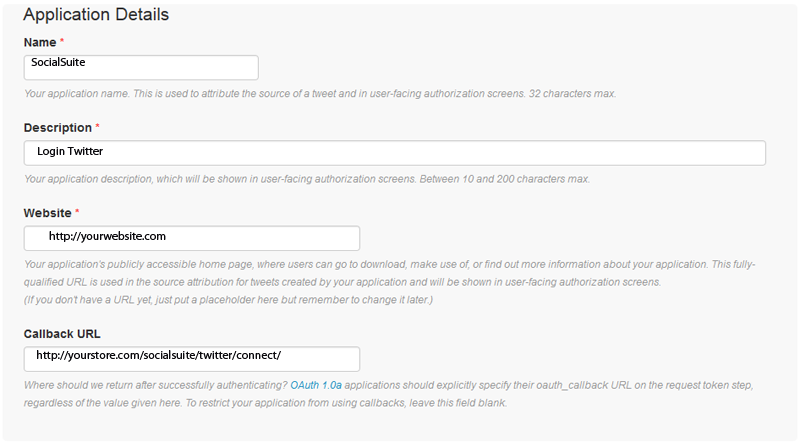
Finally click Create your Twitter application.
Yahoo API creation
Before starting using Yahoo integration features configuration, you have to create application. Please go https://developer.apps.yahoo.com/projects/. Click on Create an application. Now you see a new form that must be filled. Please specify correct values for the following mandatory fields, using our example.
In Access Scopes please select "This app requires access to private user data". Enter Callback URL. Then on the Select APIs for private user data access list please tick Social directory (Profiles). After that please choose Read/Write Public and Private.
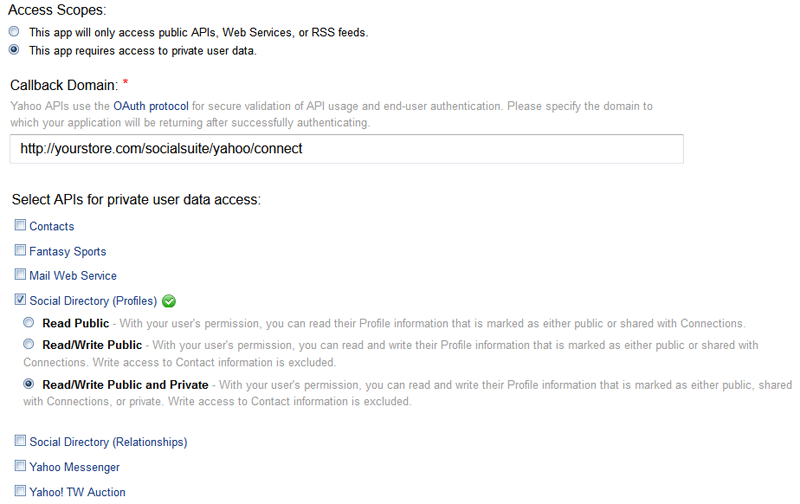
Finally click Create App.
General configurable options
The Social Suite extension offers flexible and easy to use configuration. In order to start working with configuration,please go to Magento Admin > System > Configuration >Templates-Master > Social Suit. Please notice, that the Social Suite 1.4 configuration is modified.
General configuration
Before starting using Facebook integration features configuration process, you have to create an application on Facebook. Please notice that your facebook application should be enabled for your store domain.
Before starting using Google integration features configuration, you have to create an application on Google.
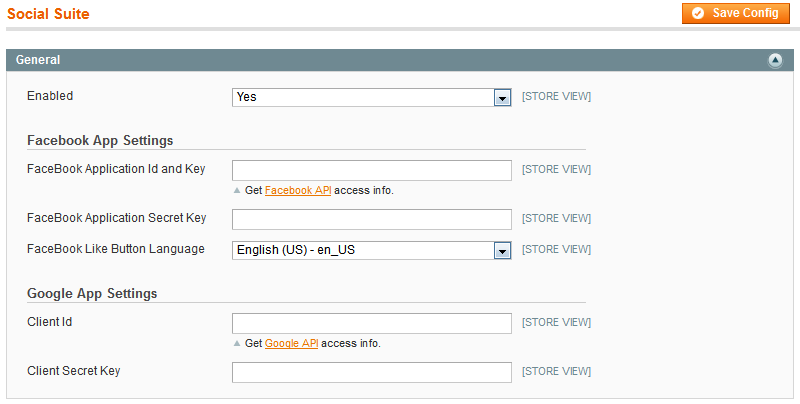
Facebook App settings
- Enabled - please select Yes to enable Social Suite extension.
- Facebook Application Id and Key - specify your Facebook application Id and key.
- Facebook Application Secret Key - specify your Facebook application secret key. Note: the configs mentioned above provide binding data to online store.
- Facebook Like Button Language - select locale that will be used for Facebook buttons and widgets.
Google App settings
- Client Id - specify your Google client Id.
- Client Secret Key - specify your secret key.
Share Reward Discount code
Share Reward Discount Code is a new feature of Social Suite extension, that allows customers to get an instant 5% or more discount on any purchase from your store while they Like you on Facebook, post a Tweet or rate you at Google Plus. Discount Modal window comes with responsive design.

- Shopping Cart Price rule - select the value of Shopping Cart rule to set the discount to the product from shopping cart.
- Enabled Banner in Shopping Cart - select Yes to enable the placing of banner in shopping cart.
- Shopping Cart Banner Image - select the image of banner to be displayed.
- Modal Window Title - please specify the modal window title to draw attention to the information about discount code. We recommend to use value like Get Your Discount code!
- In the Modal Window Description field please identify the description of modal window.
Facebook share options
Please select Yes in the Enabled Facebook Like field to allow customers to share Facebook Like. Then specify Facebook Url in the Facebook Url for Like field.Google Plus share options
Select Yes in the Enabled Google Plus Like field to allow customers to share Google Plus Like. Then specify Google Url in the Google Url for Like field.Twitter share options
Select Yes in the Enabled Twitter Share field to allow customers to share Tweet. After that specify Tweet URL in the Url for Tweet field. In the Text to Tweet field please specify the text to be Tweeted. We recommend use value like “You can get 5% discount for tweeting about this “.Facebook and Google Login settings
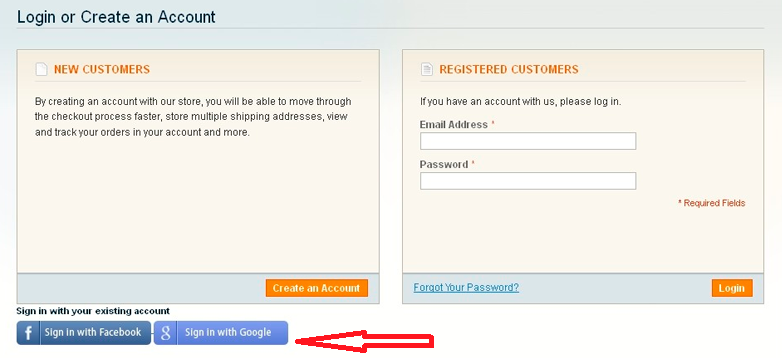
Facebook and Google Login settings tab allows you to help your customers to use their social network login feature on Fire Checkout page. Also you can set the image, that will be displayed on user page as well as on Fire Checkout page.
- Enabled - select Yes to allow customers to create new account or login with their social network accounts.
- In the Image field select the image, that will be displayed on the user login page.
- Use Facebook Login - select Yes to allow your customers log in the store by using their Facebook login.
- Image - please select the image, that will be displayed on the user page.
- Enabled Fire Checkout Login - select Yes to allow customers to use social network login feature on Fire Checkout page.
- Fire Checkout Image - select the image, that will be displayed on the Fire Checkout page.
- Use Google Login -select Yes to allow customers to create new account or login with their Google accounts.
- Image - select the image, that will be displayed on the user login page.
- Enabled Fire Checkout Login -select Yes to allow customers to use Google login on the Fire Checkout page.
- Fire Checkout Image - select the image, that will be displayed on the Fire Checkout page.
Facebook share and Comment settings
Facebook Share feature allows you to share your order, wish list or reviews about the products from the store with your friends via Facebook network.
Facebook Comments feature allows you to see the comments on the product page, which have been leaved on Facebook account page.
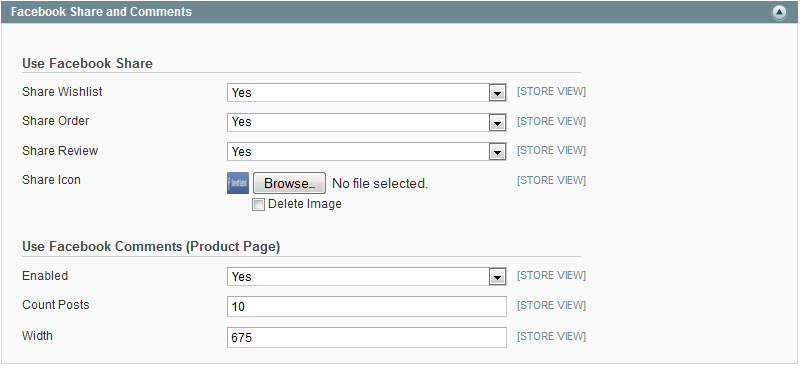
- Share Wishlist field - select Yes to allow customers to share their wish list via Facebook.
- Share Order - select Yes to allow customers to share their orders via Facebook.

- Share Review - select Yes to allow customers to share their reviews via Facebook.
- Share Icon - please specify the image that will be used for Share button.
- Enabled - select Yes to enable the display of comments from Facebook page on the store product page.
- Count Posts - please specify the number of comments (that have been left on Facebook page last), which will be displayed on the product page.
- Width - specify the width of comment block on the product page.
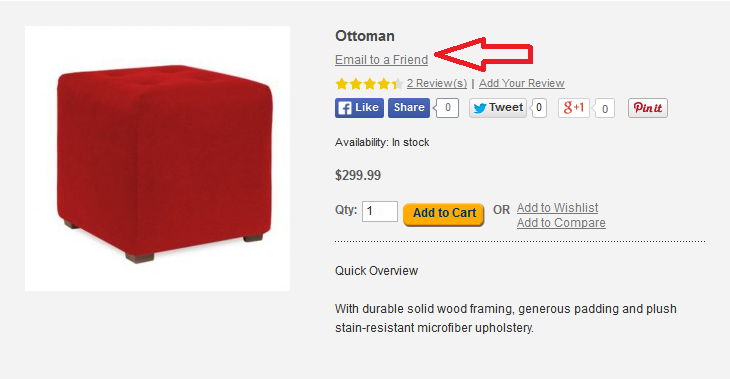
Using social buttons on the product page
Clicking Facebook Like, Pinterest, Google Plus or Twitter button is an easy way to let someone know that you enjoy it, without leaving a comment.
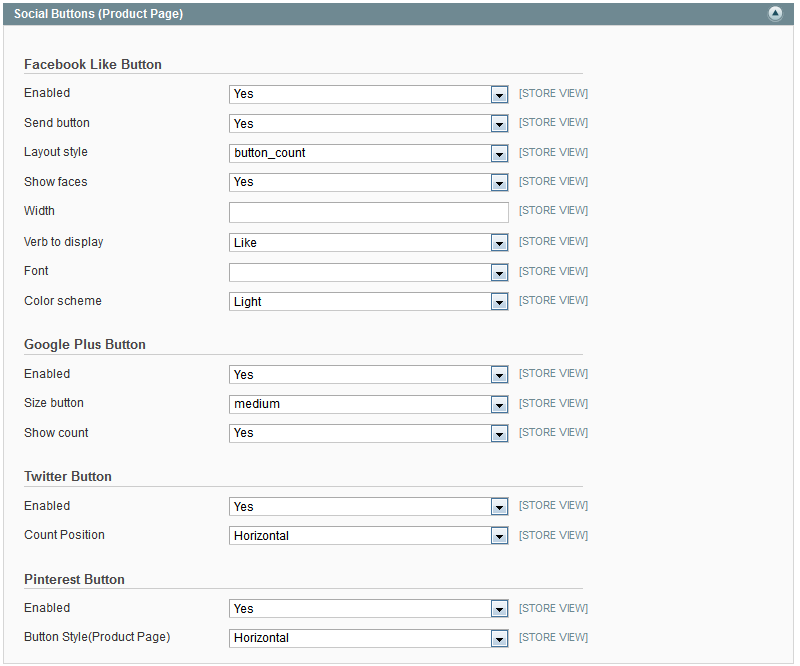
Facebook Like button
- Enabled - select Yes to enable Facebook Like button on the product page.
- Send button - select Yes to enable Facebook Send button on the product page.
- Layout style - select the style of Like button from the drop-down list. Possible values are : button_count (the counts are shown in the right side from Like button), standard (only Like is shown. No counts), box_count (the counts are shown over the Like button).
- Show faces - select Yes to enable the display of the profile pictures of Facebook users, who clicked Like button on the product page.
- Width - please specify the width of Like button block.
- Verb to display - select the type of Like button. It can also be named Recommend button.
- Font - select the font for Like button from the drop-down list.
- Color scheme - select the color for Like button.
Pinterest button
The Pinterest button will help your customers to share content with their friends via Pinterest social network. Select Yes in the Enabled on product page field to enable the Pinterest button on the product page. Then select the style of button on product page from drop-down list. Please notice, that with Pinterest page you are allowed to share products only.Google Plus button
The Google Plus button allows to spread information about your store items via Google. Select Yes in the Enabled field to enable the display of Google Plus button on the product page. Then select the size of Plus button from the drop-down list. To enable the display the number of clicks on Plus button, please set Yes in the Show count field.Twitter button
The Twitter button allows to spread information about your store items via Twitter. At first select Yes in the Enabled field to enable the display of Twitter button on the product page. Then select the display position of clicks on Twitter button.Using social buttons on the category products page
Placing social buttons on the category products pages will allow your customers to share news about your categories pages with other users. The Social Buttons (Category Products) tab contains the same fields as the Social Buttons (Product Page) tab. But the settings,mentioned below in the tab will help you to configure the display of Facebook Like, Facebook Send, Google Plus, Twitter and Pinterest buttons exactly on the category products page. We recommend you to fill all the appropriate fields. This way you will get more chances to increase new customers in your store.
Using social buttons on the category page
Social buttons on the category page can encourage visitors to spread information about products categories via their social networks.
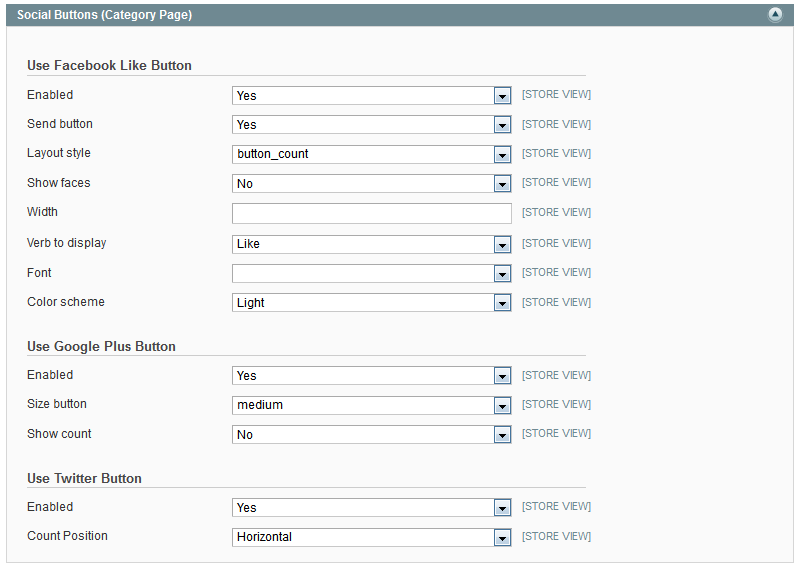
Use Facebook Like button
- Select Yes in the Enabled field to enable Facebook Like button on the category page.
- Send button - set Yes to enable Facebook Send button on the category page.
- Layout style - select the style of Like button from the drop-down list. Possible values are : button_count (the counts are shown in the right side from Like button), standard (only Like is shown. No counts), box_count (the counts are shown over the Like button).
- Show faces - select Yes to enable the display of the profile pictures of Facebook users, who clicked Like button,on the category page.
- Width - please specify the width of Like button block.
- Verb to display - select the type of Like button. It can also be named Recommend button.
- Font - select the font for Like button from the drop-down list.
- Color scheme - select the color for Like button.
Use Google Plus button
- Enabled - select Yes to enable the display of Google Plus button on the category page.
- Size button - select the size of Plus button from the drop-down list.
- Show count - select Yes to enable the display the number of clicks on Plus button.
Use Twitter button
Select Yes in the Enabled field to enable the display of Twitter button on the category page. Then set the display position of clicks on Twitter button in the Count position field.Using social buttons on the store page
Using social buttons on the store page will help your customers to share content with other users. It is an easy way for your store's promotion.
The Social Buttons (Store Page) tab contains the same fields as the Social Buttons (Category Page) tab. But the settings,mentioned below in the tab will help you to configure the display of Facebook Like, Facebook Send, Google Plus and Twitter buttons on the category page. We recommend you to fill all the appropriate fields. Finally it will lead to increase new customers in your store.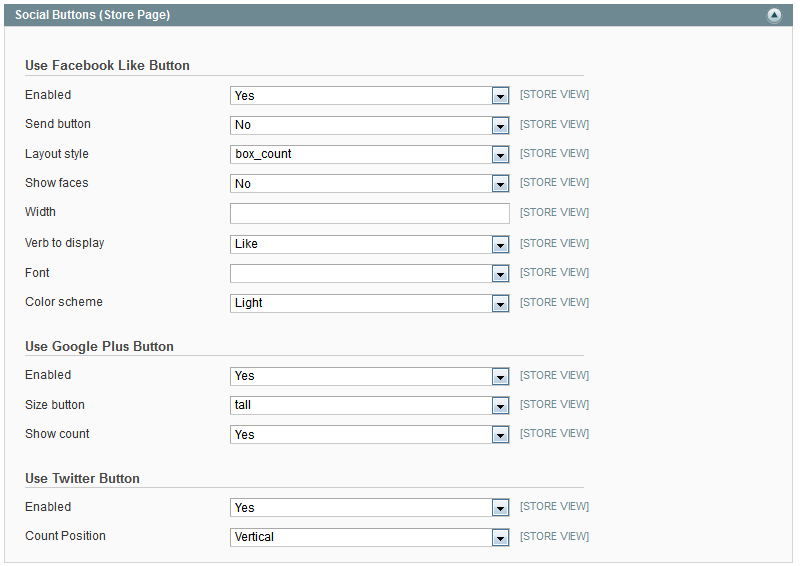
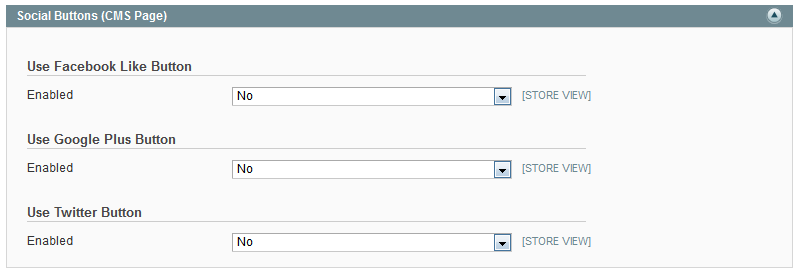
Using social buttons on CMS page
By placing social buttons on CMS page, you can spread the information about your store via social networks.
Auto-generated coupon codes creation
Promote your web-store by offering discounts to customers. You can propose either total or unique coupon code. One of the most useful Magento features is Use Auto Generation. It allows you to auto-generate the specified number of coupon codes in a few clicks.
So, in order to set up the generation of multiple coupons codes in your store, please go to Admin > Promotion > Shopping Cart Price Rules. You can Add New Rule or use already created Social Coupon as an example.
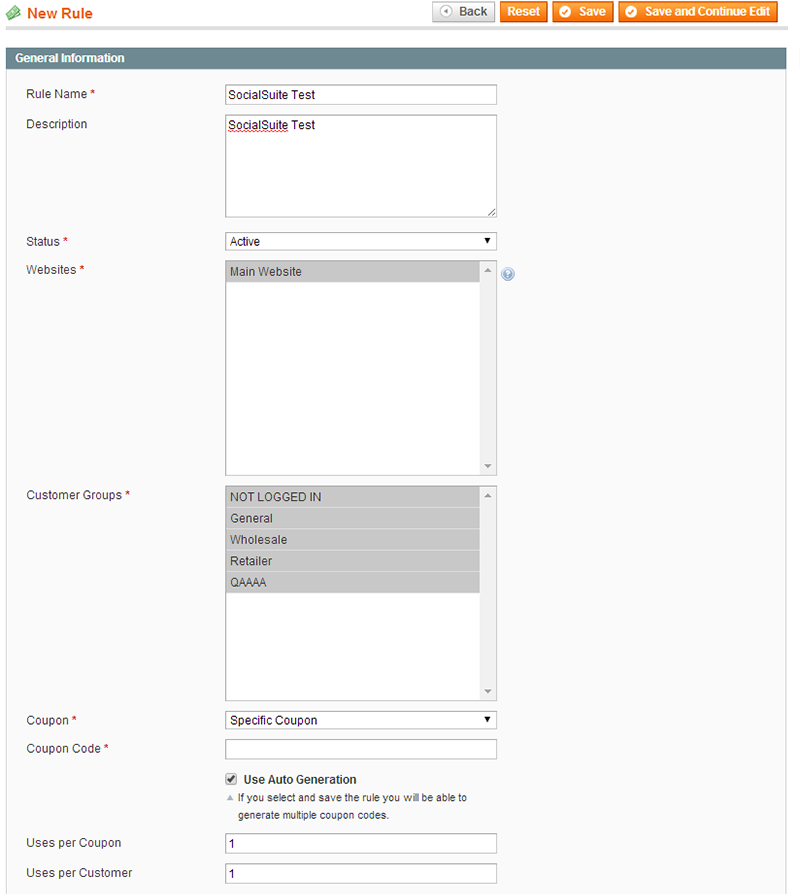
Select Rule information tab and fill the appropriate fields in the fieldset. Please notice, that in the Coupon field you have to select the Specific Coupon value. It will enable Use Auto Generation rule. Tick the box and finish filling the last fields. Click Save and Continue edit. Now in the Shopping Cart Price rule you see a new Manage Coupon Codes tab. After you filled Conditions, Actions and Labels tabs fields, go to Manage Coupon Codes tab.
At Coupons Information fieldset please fill the fields as following:
- Coupon Q-ty - specify the number of coupons,that you gonna generate.
- Code length - specify the code length.
- Code format - select the format how you want to specify the coupon code.
- Code suffix - define and specify the code suffix.
- Dash Every X Characters - specify the number of dash. We recommend you to make it easy to read.
Press Generate button. Now you see the list of Coupon Codes that were generated. You can use it within Social Suite configuration.
Troubleshooting
To isolate the source of a problem and fix it, you can use ready-made answers. Troubleshooting section is based on FAQ.All articles
Support
Template Master team is always ready to assist you with any issue related to our products.
We do offer:
- Free commercial products installation services
- Free updates within offered support period
- 3 months of free guaranteed support
Our duties:
- Responsibility for resolving products bugs.
- Help with technical queries.
- Support of popular web browsers (Firefox, Chrome, Safari, Internet Explorer 7+).
- Technical support in installation and usage of our products.
Common questions and ideas
Come up with new ideas!
There are no product questions yet.